How to Scan an Object: The Complete Capture Guide
Your first scan probably won't be perfect. The good news: getting from "object on a desk" to "watertight 3D mesh" is a small number of repeatable habits, not a craft. Walk a full circle. Three heights. Lock exposure. Keep overlap above 70%. Process the photos. That's the whole loop.
This is article two of a ten-part series. Article one explained what photogrammetry actually is. This one is the concrete walk-through — what you need, what to point the camera at, and what to do when something looks broken.
What You Actually Need
You probably already own everything required. The only hard requirement is a camera that can lock its exposure and focus. That rules in: any iPhone since the iPhone XR (2018), any decent Android phone, every modern mirrorless body, every DSLR. It rules out: nothing modern, basically.
- A camera. A phone is enough. A mirrorless body with a prime lens gives slightly cleaner results but adds zero magic.
- An object. Pick a good one — see the next section.
- Diffuse light. Overcast outdoor, north-facing window, or a softbox. No direct hard sun, no flash, no harsh table lamp.
- A Mac. Replica runs entirely on Apple Silicon and processes everything locally. The free tier accepts up to 50 photos per project.
That's the whole shopping list. No tripod, no turntable, no studio. Those things help; they aren't required.
Choose Your First Object Carefully
Photogrammetry works by finding the same surface points in many photos. If your object doesn't have distinct surface points, the software has nothing to lock onto. Save yourself a frustrating evening: pick something the algorithm can see.
Good first-scan candidates
- A ceramic mug with a printed pattern
- A rock, a piece of driftwood, a pinecone
- A leather shoe, a baseball cap, a worn book
- A small painted figurine
The common thread: matte surface, visible texture, real colour variation. Pix-pro's photo-amount guide puts the floor at 20–40 photos for a textured small object; below that the software starts to struggle.
Skip on your first attempt
- Glass, mirrors, polished chrome — reflections move with the camera, so feature matching fails
- A plain white t-shirt, a fresh-painted wall, a single-colour billiard ball
- Anything wet, oily or freshly waxed — the highlights confuse the matcher
Reflective and textureless objects are scannable, but they need matte spray, cross-polarisation, or surface tricks — a topic for later in the series. Start easy.
The Capture Path
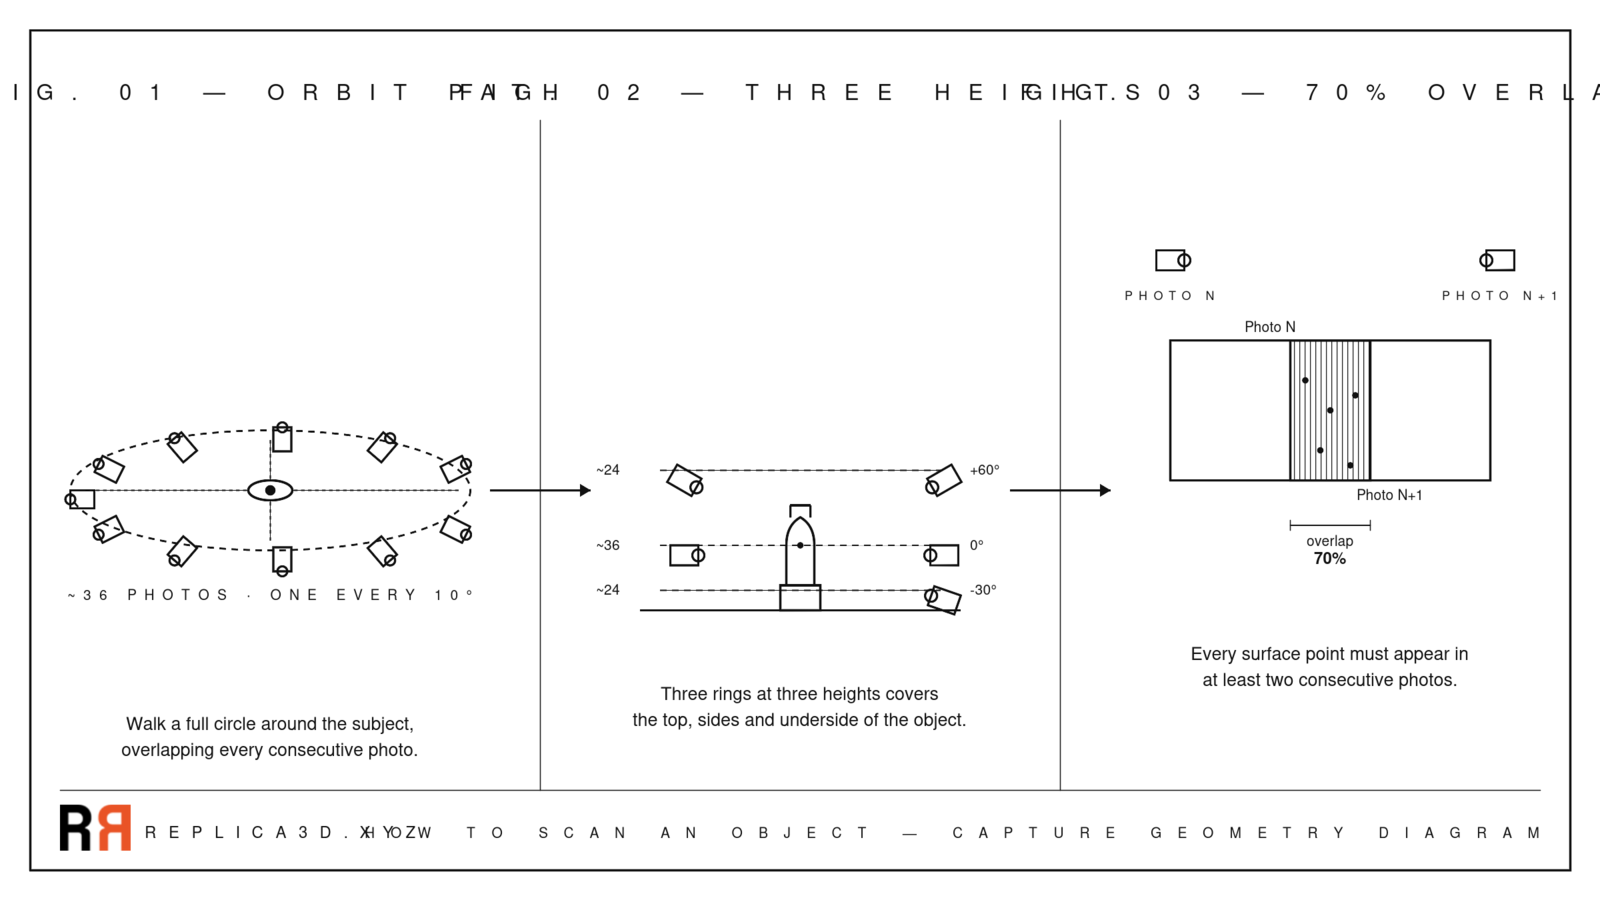
The single rule under everything else: every surface point must appear in at least two photos, and ideally three. The capture path is the cheapest way to guarantee this.
For a hand-sized object on a table, the proven pattern is three rings at three heights. The orbit SVG below shows the top-down view of the eye-level ring — twelve cameras drawn for clarity, in practice you'll shoot one photo every ~10° for roughly thirty-six photos per ring.
- Eye-level ring (0°): ~36 photos. Walk a full circle, holding the camera roughly at the object's mid-height.
- High ring (+45° to +60°): ~24 photos. Tilt the camera down so it looks at the top quarter of the object. This catches the lid, the shoulders, the top surface.
- Low ring (-20° to -30°): ~24 photos. Crouch and shoot upward. This catches the underside lip and the part of the object that's hidden from eye level.
Hamilton College's photogrammetry capture guide and the 3DwithUS turntable workflow both converge on this three-pass pattern. It's not a Replica-specific recipe; it's how the entire industry shoots small objects.
If the underside matters, flip the object after the three rings are done and shoot one more pass on the new top. This is the only practical way to get the floor of an object — short of suspending it in mid-air with fishing line.
Drew Silcock has run the geometry on minimum view counts: four cameras can theoretically reconstruct a simple convex object; nine are needed for anything with concavities. Eighty-four well-placed photos give you a comfortable margin for a small object. The point is: a hundred-photo project is not "a lot of photos" — it's the bottom of the useful range.
Overlap Is the Real Metric
Photo count is a side effect of overlap. Two consecutive photos should share at least 60% of the same view, and ideally 70–80%. Below 60%, the matcher loses the thread between shots and the model breaks into floating fragments. Centerline Design's photo-count breakdown and Pix-pro's misconceptions piece both name this as the most common first-attempt failure.
In practice, 70% overlap means: take a step, frame the object, shoot, take a step. If your overlap looks "comfortable," it's probably right. If you're worried you took too many photos, you almost certainly didn't.
Lighting Basics
Photogrammetry needs even light. The matcher reads textures, not shadows, and a hard shadow that moves between shots looks like a moving texture — which the algorithm tries to triangulate as geometry. The result is a model with phantom holes or smeared surfaces.
The hierarchy:
- Overcast outdoor. The easiest light there is. The sky is one big softbox, no harsh shadows, no hot highlights. Free.
- Indirect window light. A bright north-facing window with the object placed a couple of metres back works almost as well.
- Studio softbox or diffused lamp. Workable, but match the colour temperature across all lights and don't move anything mid-shoot.
- Direct sun. Avoid. The shadow edge shifts as you walk and the highlights bake into the texture.
- On-camera flash. Worst option. The light moves with the camera, so every photo has the same specular hot-spot in a different surface position.
Full settings — aperture, ISO, shutter, focus — come in article six of the series. For now: lock the lighting, then lock the camera.
The Walk-Through, Step by Step
- Set the scene. Place the object on a non-reflective neutral surface — a sheet of grey cardboard works. Make sure there's enough room to walk a full circle around it without bumping anything.
- Lock exposure and focus. On iPhone, long-press the subject in the Camera app until the AE/AF Lock badge appears. On Android, do the same in your camera's Pro mode. On a DSLR or mirrorless body, switch to manual mode (M), set aperture to f/8–f/11, ISO 100–200, shutter 1/125, and switch the lens to manual focus. Don't change any of these mid-shoot.
- Walk the eye-level ring. Hold the camera at the object's mid-height. Frame so the object fills roughly two-thirds of the frame. Step, shoot, step. Aim for ~36 photos.
- Walk the high ring. Raise the camera so it's looking down at roughly 45°. Same circle, ~24 photos.
- Walk the low ring. Crouch. Tilt the camera up toward the underside. Same circle, ~24 photos.
- Flip if needed. If the object has a base or floor surface that matters, turn it 90° and shoot one more ring on the new top.
Per Prusa's phone-camera photogrammetry guide, a single pinch-to-zoom mid-shoot will break the whole capture set — the matcher treats the new focal length as a different camera. Don't touch the zoom.
Bring the Photos Into Replica
The capture is the hard part. Processing is mostly waiting.
- Open Replica and click the + button in the project sidebar.
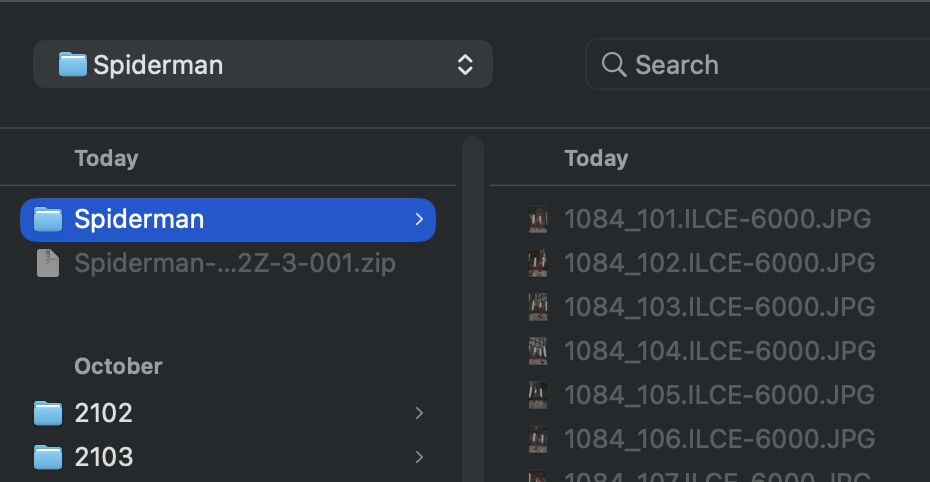
- Point Replica at the folder of photos.
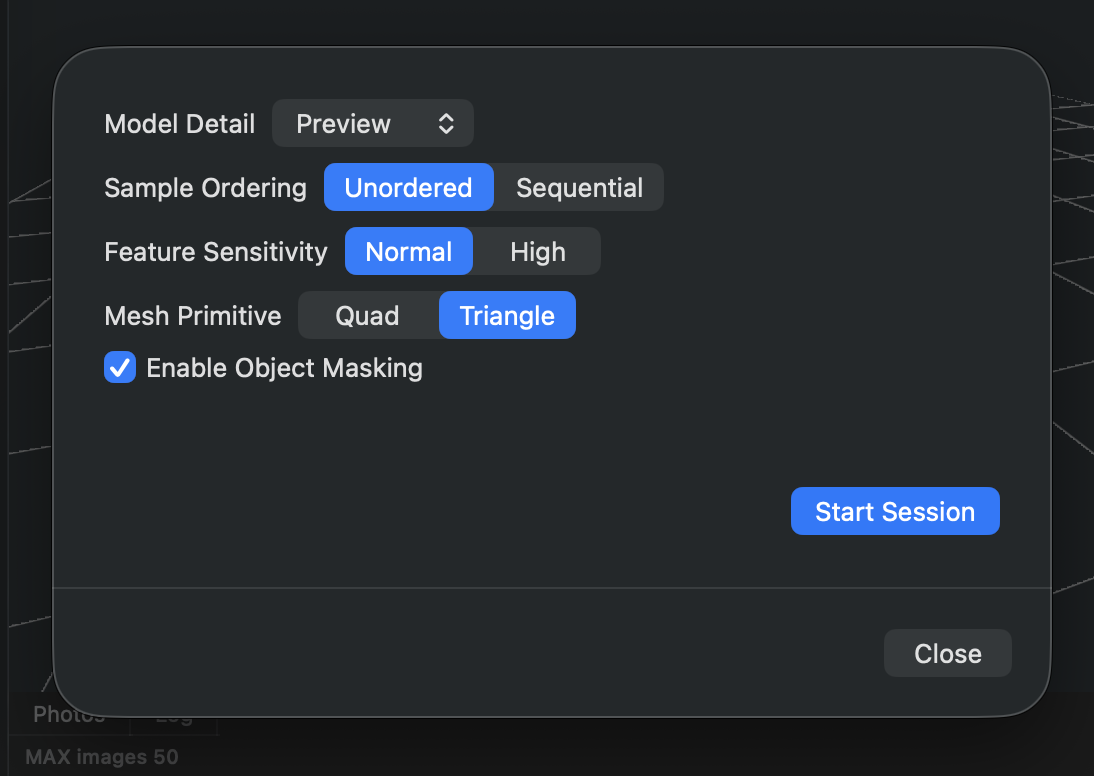
- Pick a session preset (Quick gives you a fast preview; Medium or High is the right setting for final output) and press Start Session.
Replica handles structure-from-motion, dense reconstruction, meshing and texturing locally on your Mac. There's no upload to a cloud service — your photos and the reconstructed model never leave the machine. Watch progress in the Log tab; the default export is USDZ, and the Getting Started manual covers the OBJ / FBX / GLB / STL export paths if you need them.
If you want to see the processing run on a known-good set of photos before scanning your own object, the free Appian Tomb dataset gives you 116 photos plus the finished model.
When the First Scan Looks Broken
The first scan often has a hole, a smeared face, or a chunk floating off to the side. Don't panic — and don't rescan blind. The five fixable causes are covered in article eight of this series, but the short-form triage:
- Holes on top or bottom of the model: you only shot the eye-level ring. Add the high and low rings.
- Smeared or melted surfaces: the lighting changed mid-shoot. Lock exposure and reshoot.
- Half the object reconstructs, the other half is missing: your overlap dropped below 60% somewhere in the circle. Walk slower.
- A floating chunk in space: a feature on the background matched between photos. Use a more neutral backdrop or enable Replica's Object Mask to ignore everything outside the subject.
- Glassy or chrome objects come out as wireframe ghosts: that's expected. See article ten for matte-spray and cross-polarisation fixes.
Next in the Series
You now have a working capture loop. Next up: Photogrammetry vs 3D Scanning: What's the Actual Difference? — where photogrammetry sits in the wider 3D capture landscape, and when LiDAR, structured light, or time-of-flight is the better tool.
Questions or a scan that won't behave? Reach out at info@ambiensvr.com.